Found this great tutorial!
link http://vectips.com/tutorials/create-a-trendy-seamless-type-pattern/
Create a Trendy Seamless Type Pattern
In this tutorial, I will show you how to create a trendy seamless type pattern in Illustrator using some text and icons. Although I won’t go in-depth about creating the icons, we will take a close look at creating a seamless pattern swatch. You can easily apply these techniques to other seamless pattern swatches.
Final Image
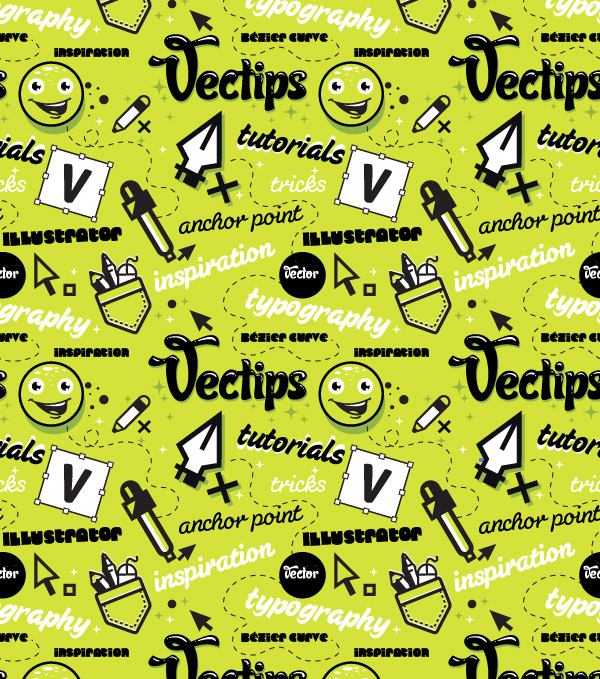
Below is the final pattern we will be working towards.

Tutorial Details
- Program : Adobe Illustrator CS4
- Difficulty: Intermediate
- Topics Covered: Pattern Swatches
- Estimated Completion Time: 1 hour – 1.5 hours
Step 1
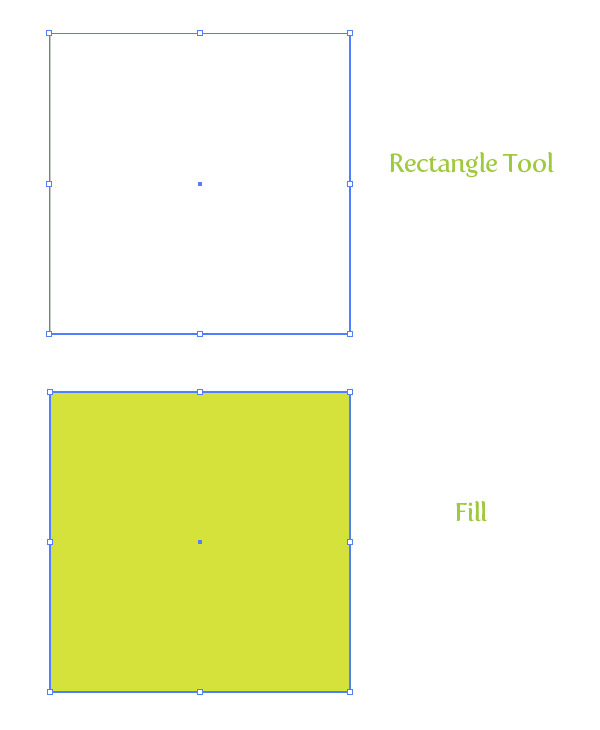
Create a new document and use the Rectangle tool (M) to create a square. For the pattern, you are going to want a square with simple values (100 px as opposed to 101.375 px) so it is easy to recall the values when moving and transforming. I am using a rectangle that is 300 px by 300 px. Fill the rectangle with a base color and take off any stroke.
Step 2
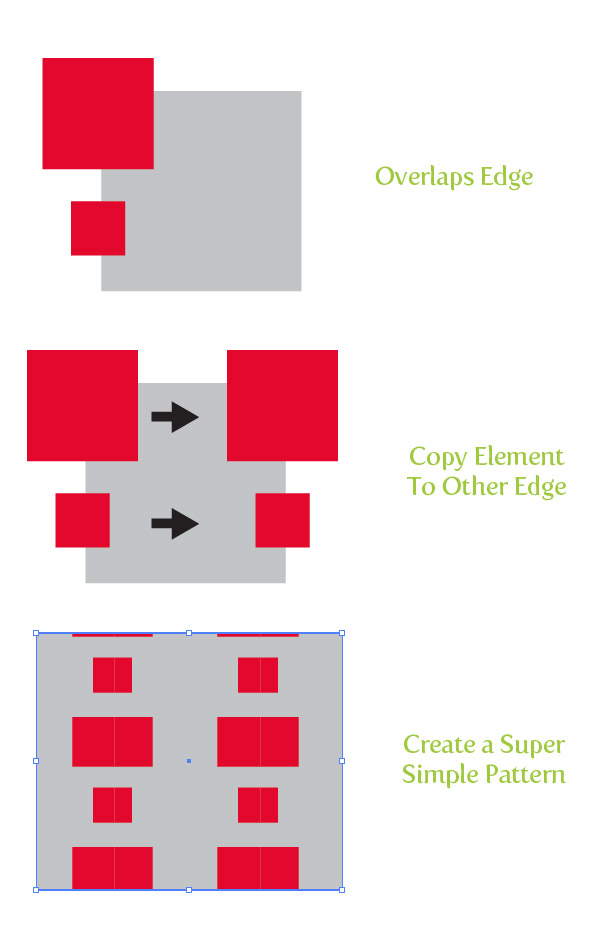
In a seamless pattern, elements that overlap edges over our square need to be copied to opposite edges to create the repeated seamless effect. If an element is hanging off the left edge 10 px, you have to make sure the element is repeated on the right edge 10 px from the edge. This seems more complicated than it really is. Basically we Copy (Command + C) an element, Paste in Front (Command +F) and move to the opposite edge with a value equal to the dimensions of the our original square’s edge (in the case of this tutorial, 300 px). It will make more sense when you see it in action in the next couple of steps.
Step 3
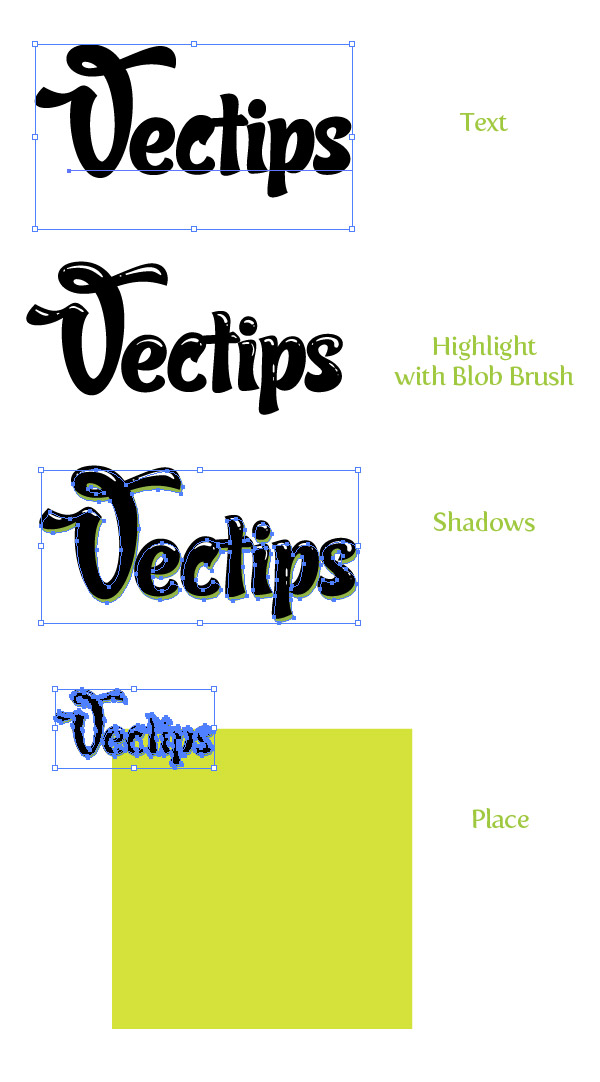
With the Text tool (T) create some text and choose a fun font. I am using Candy Script. I added some highlights with the Blob brush, which you don’t have to do. I also created a simple shadow by Copy (Command + C), Paste in Back (Command + B), and changed the fill of the text. Group (Command + G) all the text elements and place over the top left corner of the square.
Step 4
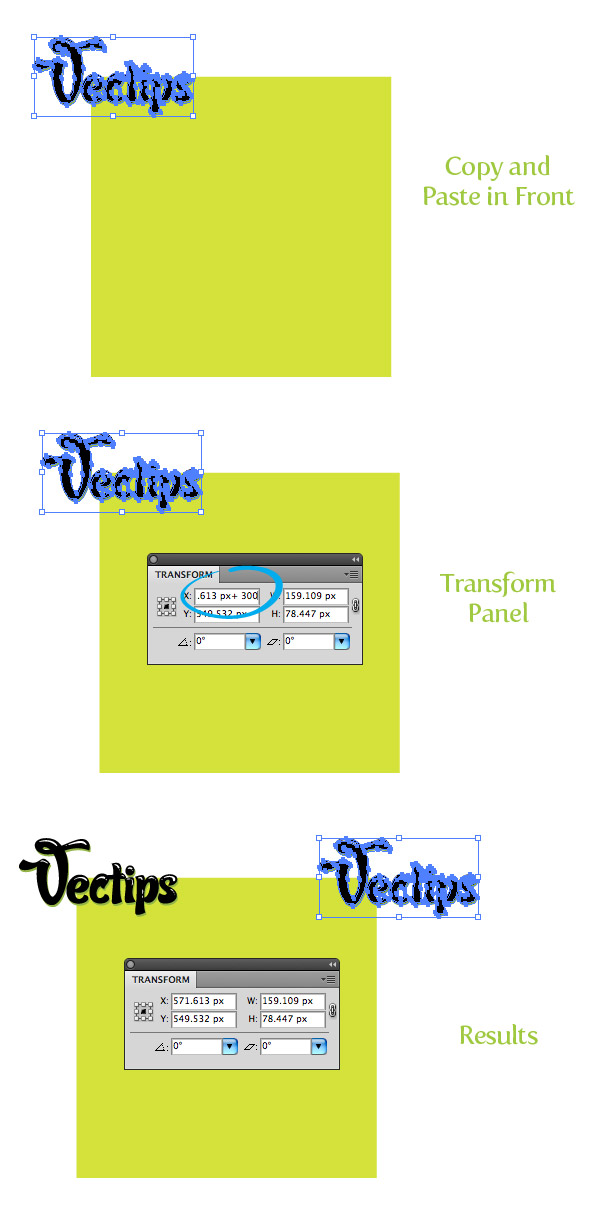
Since we placed the text over the top and left edge, we have to make sure it will repeats over the bottom and right edges of the square. With the text elements selected, Copy (Command + C) and Paste in Front (Command + F). With the text still selected, from the Transform panel type “+ 300 px” (the width of our original square) in the X Value AFTER the current X Value. After you press Return, you can see it moved the text the exact distant to make the pattern seamless.
Step 5
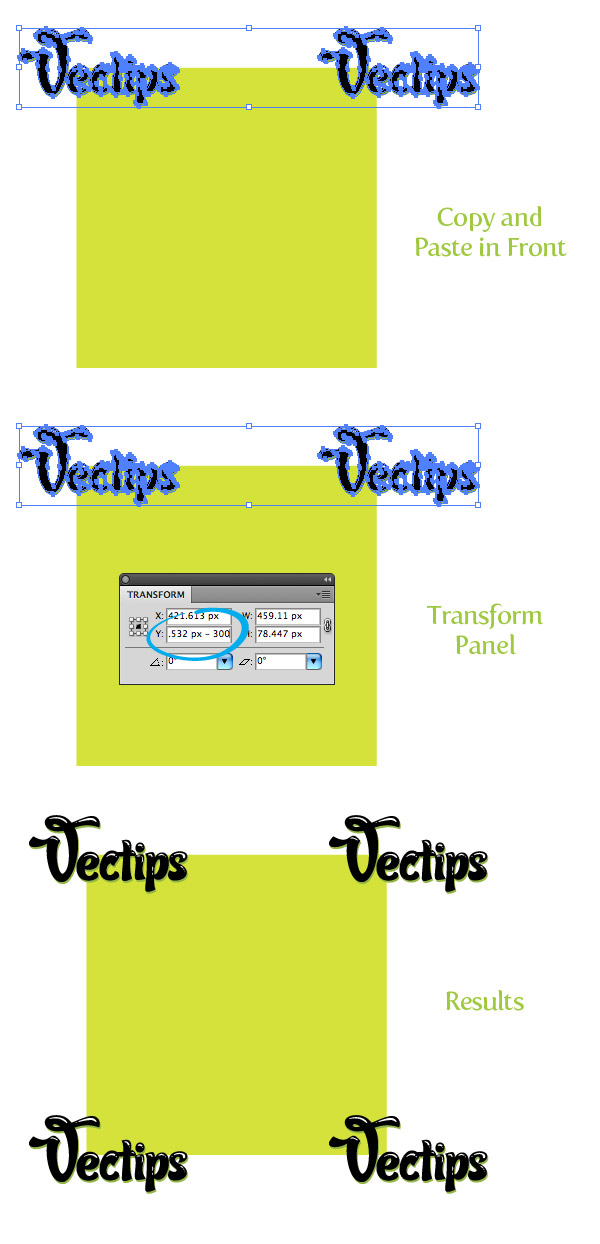
We repeated out text element on the right side, now we have to repeat our text over the bottom edge. Select both copies of the text element, Copy (Command + C), and Paste in Front (Command + F). With the copies still selected, type “- 300 px” in the Y value AFTER the current Y value. After you press return you should now see four text elements. To learn more about math function in Illustrator, read ourQuick Tip: Math Function in Illustrator.
Step 6
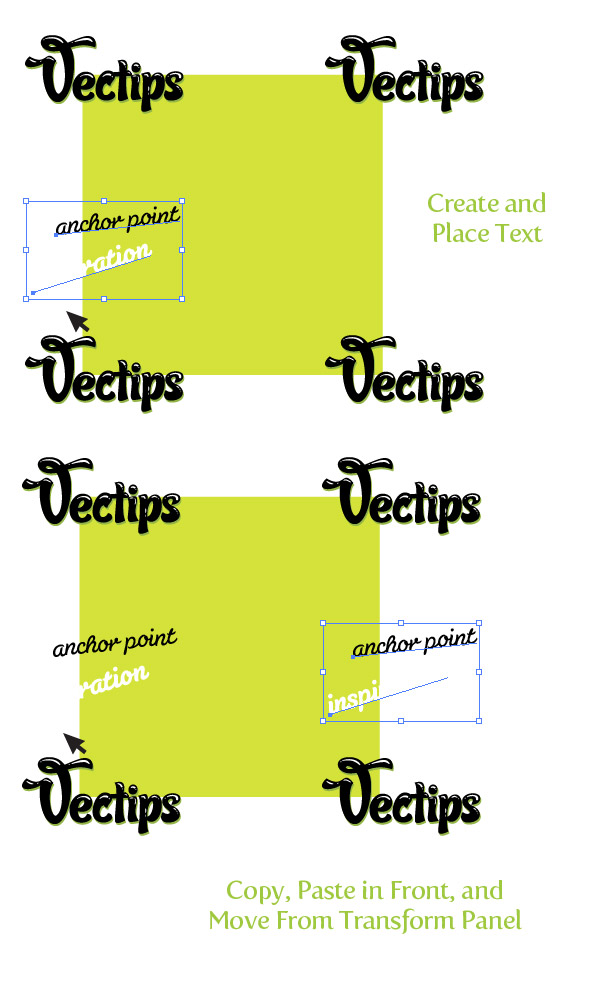
Now that we have our first element created and placed, we can start adding other overlapping edge elements that we need to copy, paste, and move. In the next step I choose a different font and typed out some text with the Text tool (T). I used the Selection tool (V), rotated some of the text, and changed the fill of one of them. This text is only overlapping the left side, so Copy (Command + C), Paste in Front (Command + F), and type “+ 300 px” (the width of our original square) in the X ValueAFTER the current X Value.
Step 7
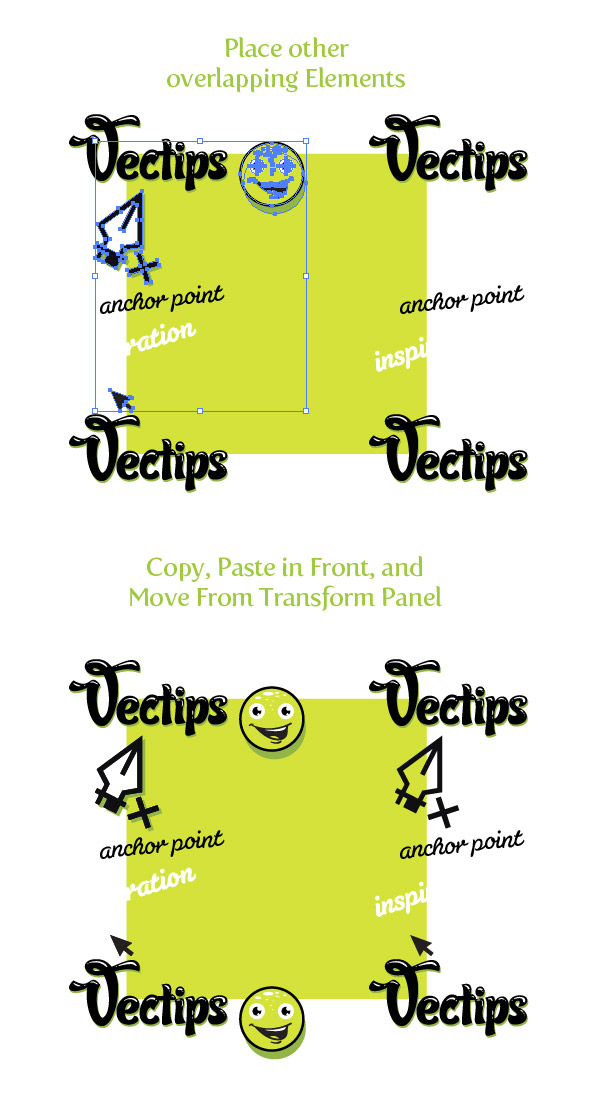
This is a good point to add some other elements other than text. I rounded up some logos and icons that I have created in the past. I won’t go into much detail about how I created the because I don’t want to take focus away from the pattern making. Basically I used the Pen tool (P) to create most of the Illustrator icons and added different fills and shadows to give it a little depth. I start by placing the icons in spots that are overlapping the edge before I fill in the middle of the square. Since there are overlapping edges, make sure to Copy (Command + C), Paste in Front (Command + F), and change the corresponding X or Y value from the Transform panel.
Step 8
Now that we have all the overlapping elements laid out, we can start filling in the rest of the square with other text and objects. I used some more text in different Susa, Sugar Pie, and Cooter Fonts. I used some more icons created with the Pen tool (P), dashed stroke elements, and warped ellipses. You can fill the square up with whatever elements you want.
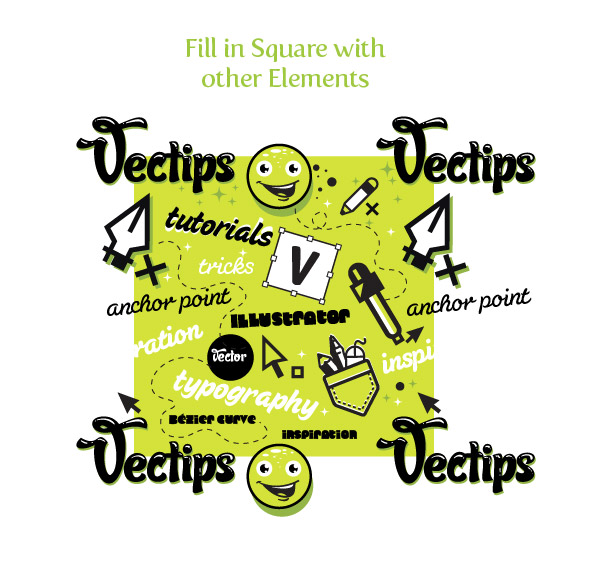
Step 9
All are elements are done and now we can create a pattern swatch from the artwork! First, select the original square, Copy (Command + C), Paste in Back (Command + B), and take off any fill and stroke. We have to create this empty square copy so Illustrator can define the edges of the swatch. If we didn’t include this empty square shape, we will have a weird looking pattern that is not seamless.
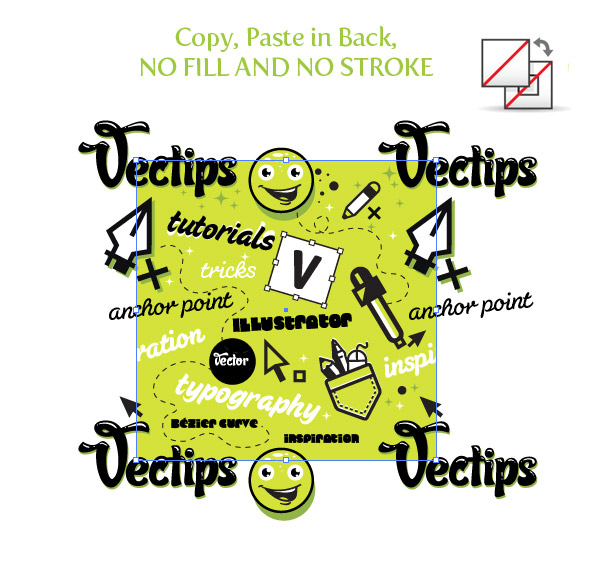
Step 10
Select all the artwork and drag it into the Swatches panel. Now you can use your new seamless type pattern swatch on any object!
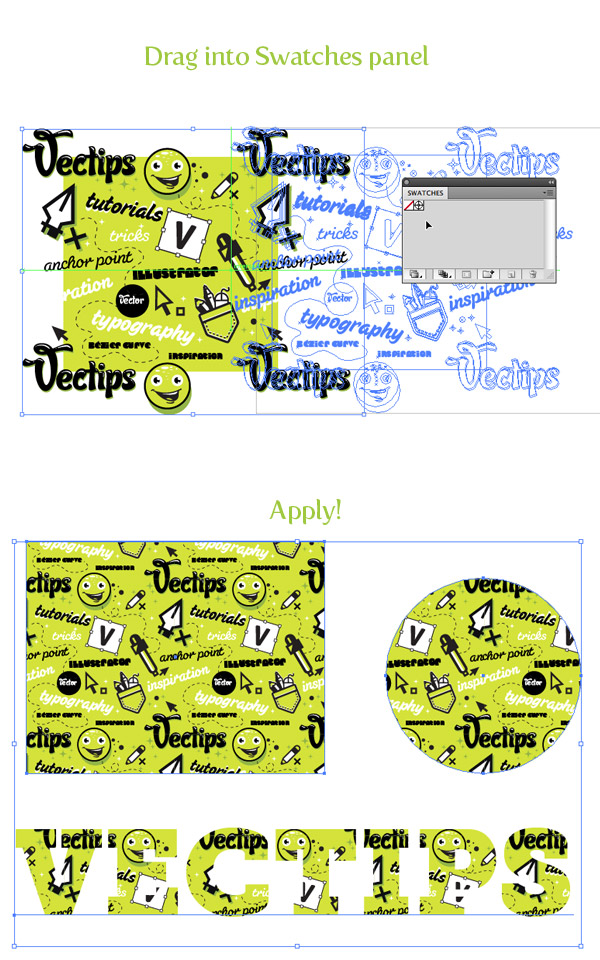
Final Images
Below is the final seamless pattern again. How did you do? Post links to your results in the comments! You can use these patterns on website backgrounds, Twitter backgrounds, printed projects and much more. I really want to make a throw pillow out of mine!
